
QuickBooks Integration
Connecting AnkorPay to QuickBooks Online
The QuickBooks integration sends your approved Operations Expenses from AnkorPay straight into QuickBooks Online, so you don't need to re-enter them by hand. You set it up once per vessel account, and each vessel can connect to its own QuickBooks company.
Before you start
Make sure you have:
- Login details for the QuickBooks Online company you want to connect.
- Your QuickBooks set-up ready: bank accounts, Chart of Accounts (expense categories) and tax codes. AnkorPay uses what already exists in QuickBooks, so it's worth checking these first.
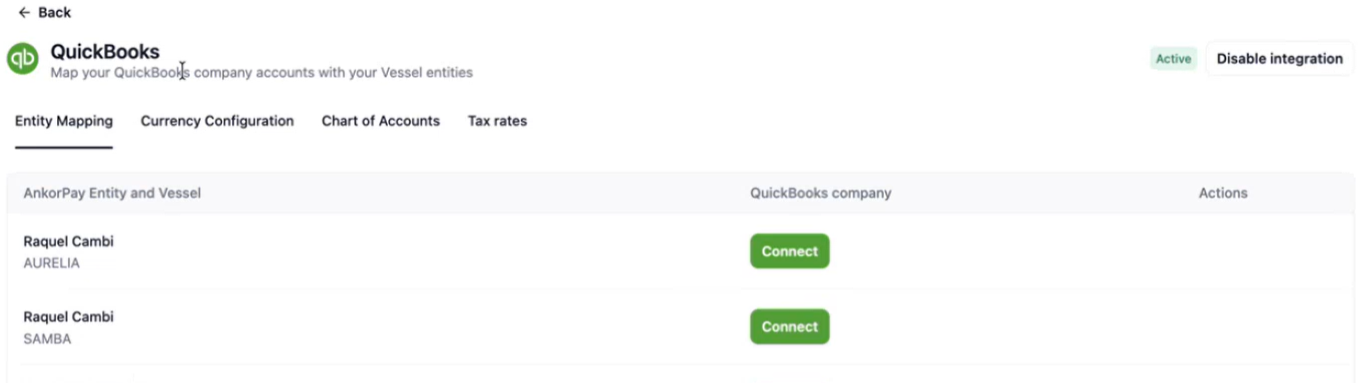
Step 1: Connect your vessel (Entity Mapping)
- Go to Settings > Integrations > QuickBooks and open the Entity Mapping tab.
- You'll see each of your vessels listed. Click Connect next to the vessel you want to set up.
- Log in to QuickBooks and choose the company to link to that vessel.
- Repeat for each vessel. Different vessels can connect to different QuickBooks companies.
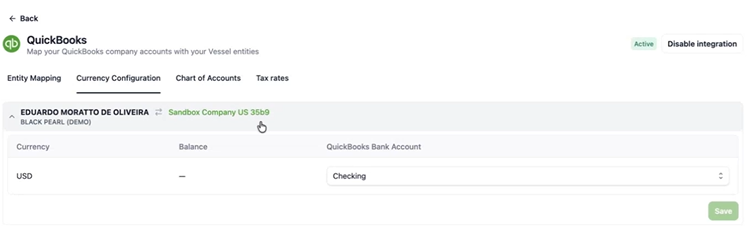
Step 2: Map your currencies (Currency Configuration)
Open the Currency Configuration tab. For each currency on the vessel, choose the QuickBooks bank account the expenses should be recorded against, then click Save.
Expenses are matched to a bank account by their currency. Make sure every currency you spend in has a bank account mapped.
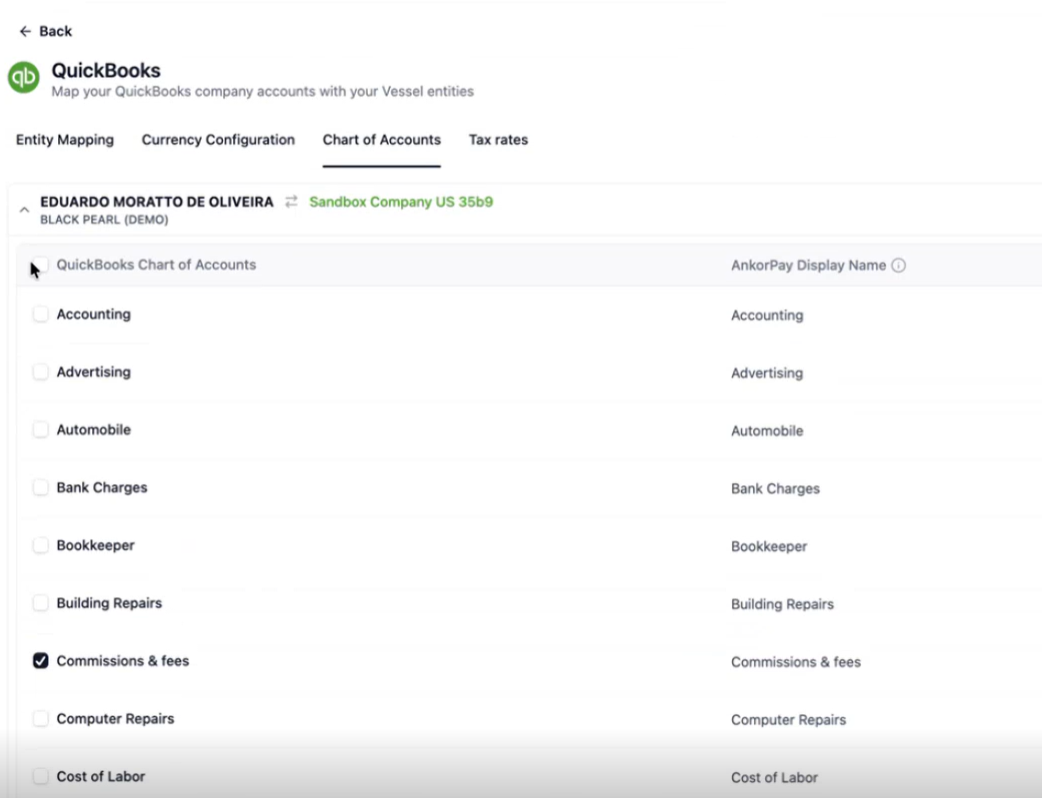
Step 3: Choose your expense categories (Chart of Accounts)
Open the Chart of Accounts tab. Here you'll see your QuickBooks accounts.
- Tick the accounts you want to use as expense categories in AnkorPay.
- Check the AnkorPay Display Name, which is how the category will appear to your crew.
- Click Save.
Please note: once saved, these categories replace the expense categories you previously had in AnkorPay. From then on, your crew will categorise expenses using your QuickBooks Chart of Accounts.
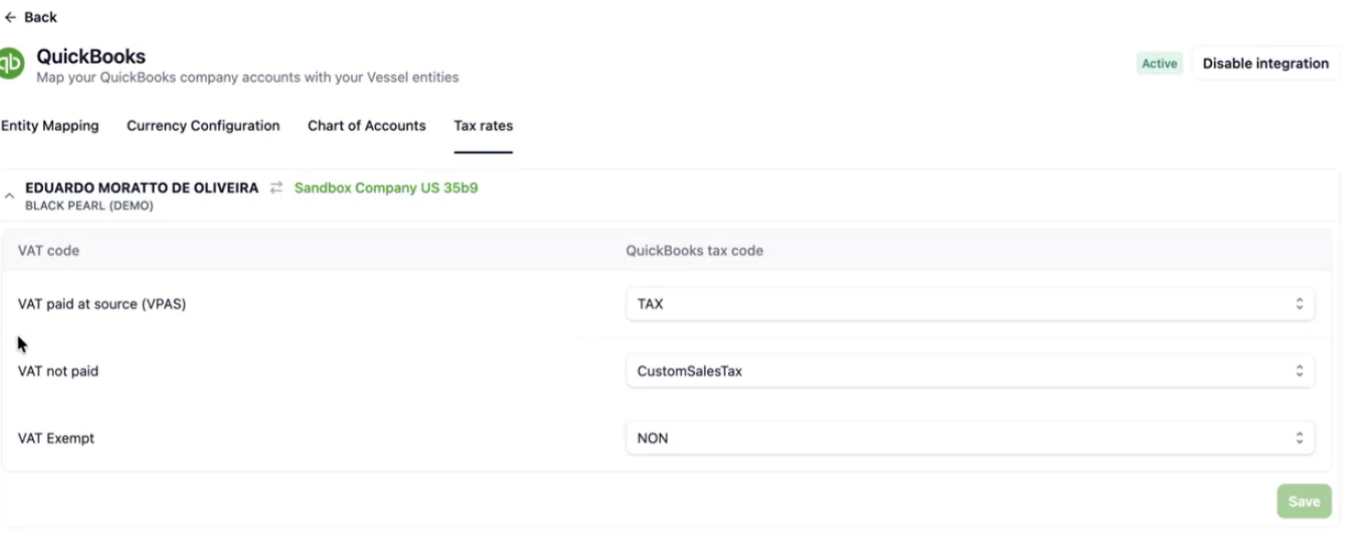
Step 4: Map your tax rates (Tax Rates)
Open the Tax rates tab and match each AnkorPay VAT option to the right QuickBooks tax code for your set-up:
- VAT paid at source (VPAS)
- VAT not paid
- VAT Exempt
Click Save when done.
⚠️ Important: If you disable the QuickBooks integration, all of your mapping will be lost and you'll need to set it up again. Only disconnect if you're sure.
Syncing your expenses
Once the integration is active, you're ready to sync.
- Only expenses with the status Approved are synced. Expenses that are Incomplete or Ready for review won't be sent until they're approved.
- Syncing is manual. Go to Expenses and click Sync to QuickBooks in the top-right corner.
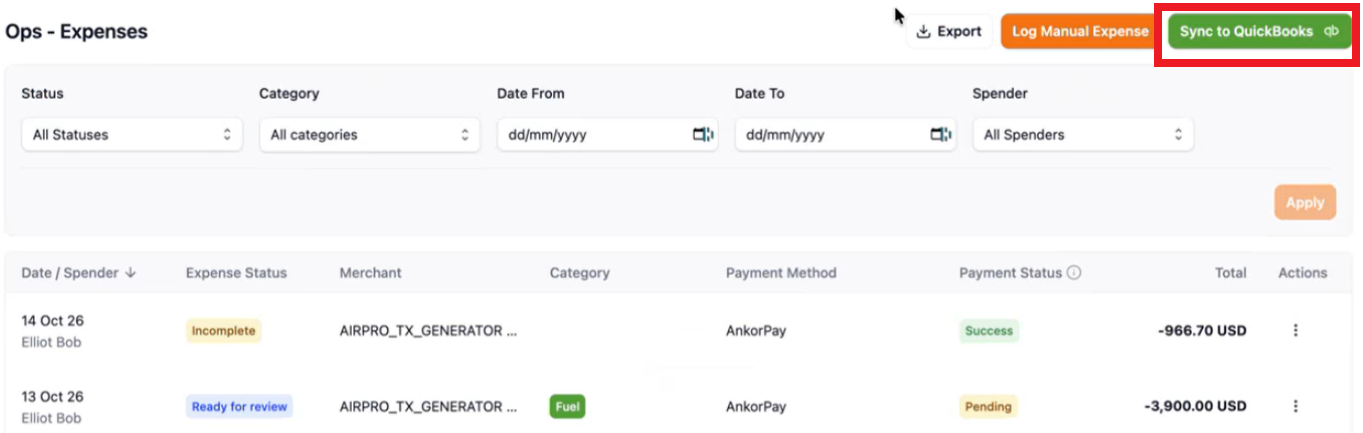
Each approved expense is created in QuickBooks as an expense transaction. The merchant is matched to an existing vendor in QuickBooks, or created as a new vendor if there isn't one yet.
Checking your sync status
After syncing, look at the coloured dot next to each approved expense:
- 🟢 Green dot: the expense synced to QuickBooks successfully.
- 🔴 Red dot: the sync failed. Hover over the dot to see the reason
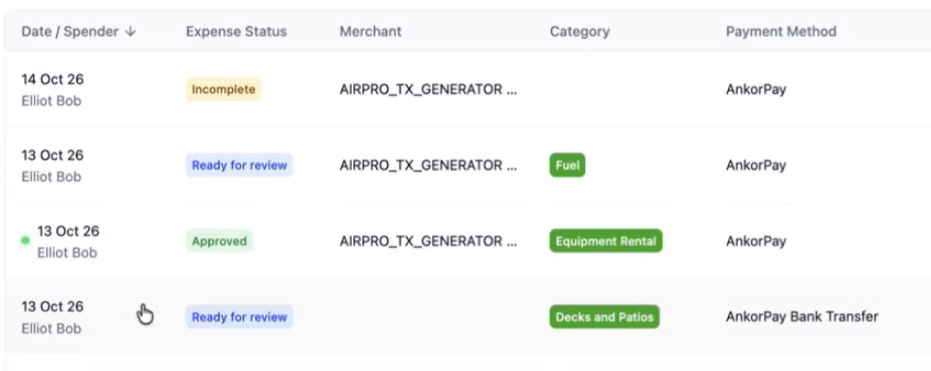
Expenses that aren't approved yet have no dot.


Fixing a failed sync
Hover over the red dot to read the error, fix the cause, then click Sync to QuickBooks again.
You will see the error message displayed, for example:
Error | What it means | How to fix it |
|---|---|---|
MISSING_EXPENSE_ACCOUNT | The expense's category isn't linked to a QuickBooks account. | Check the expense category, and make sure it's mapped in the Chart of Accounts tab. |
Still stuck? Contact us at support@ankor.io.